How to Make Custom LUTS For Final Cut Pro X 10.4

In this tutorial, we will show you how to make your own custom LUTS for Final Cut Pro X colour grading (Version 10.4)
The new update to Final Cut Pro X (10.4) bought the ability to load custom camera and custom creative LUTS.
We will concentrate on the latter as we would think most creative LUT use will be on the Timeline and not in the Inspector.
Not too sure what a LUT is? No, not Luton Airport on a plane ticket, it's a table of numbers that gives an output value for each of the input values. Think of each pixel's RGB number being changed by a set of rules.
To make a LUT, we show you the process in Photoshop and Affinity Photo. There are many image processing applications that can output a LUT and the process will be similar. You can of course do this in DaVinci Resolve and other third party apps..
Building a LUT in Photoshop
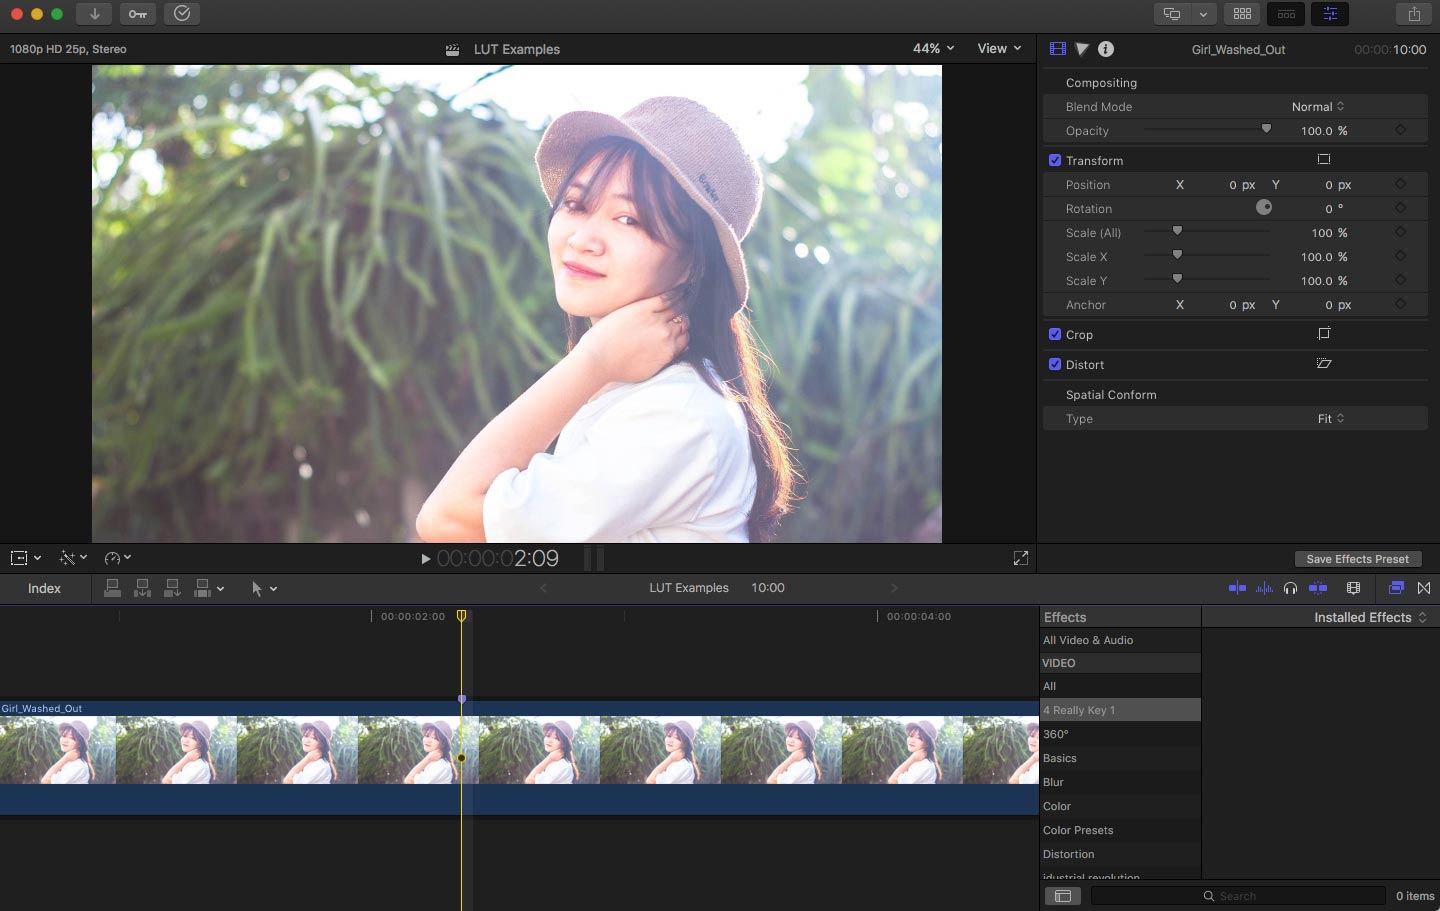
The easiest way we found to get the right setting in Photoshop was to output a still from FCPX. Here you can see we have a washed out look that we want to correct.
If you haven't exported a still image out of Final Cut Pro before, you may need to go into the FCPX preferences and add that option. It will then appear in the share options.

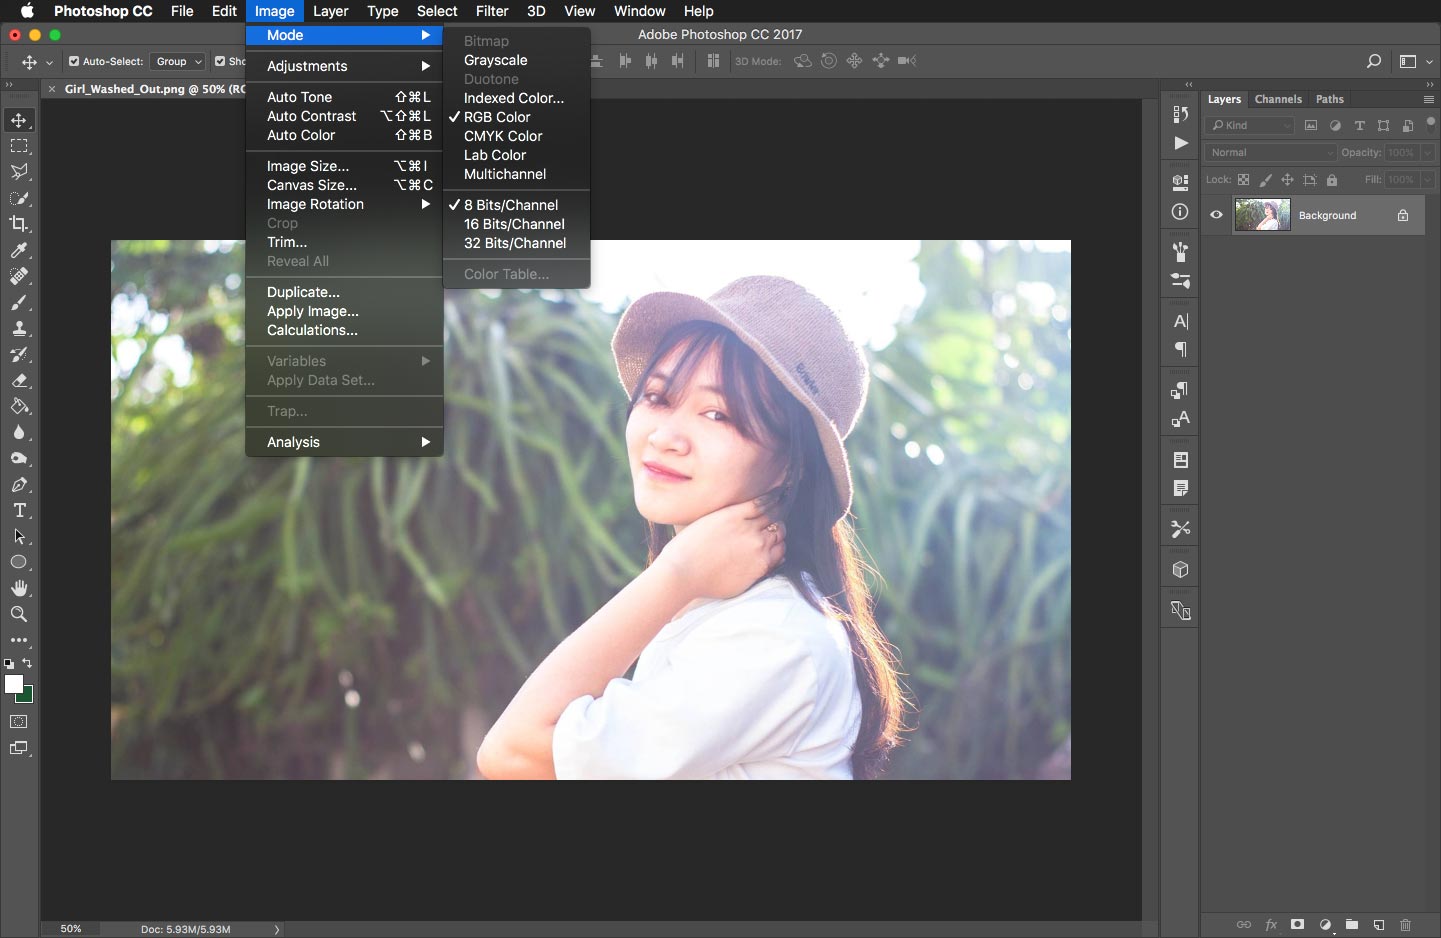
Open the saved image in Photoshop. It is important that Photoshop has a background and getting the image in this way will make sure all the settings are ok. You can see below that the project has been automatically set to 8bit RGB. A CMYK Photoshop project won't work.
Time for the fun! Let's start some colour correcting.
This can only be achieved by adding adjustment layers in Photoshop. Filters don't work and you can't construct complex image masks either, the effect has to be applied across all of the image.
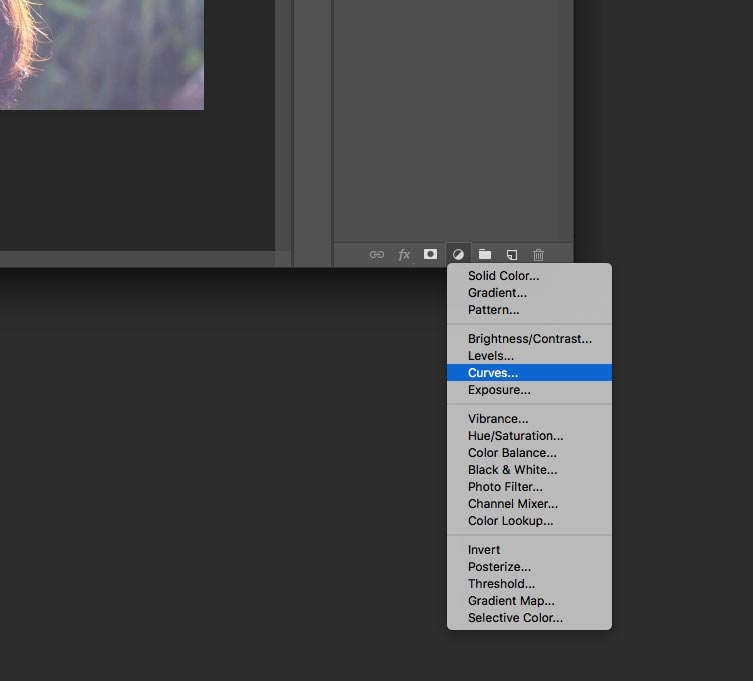
Here you can see we have added a Curves and Vibrance adjustment layer in Photoshop. You can add as many layers as you want to get some very complex grades.

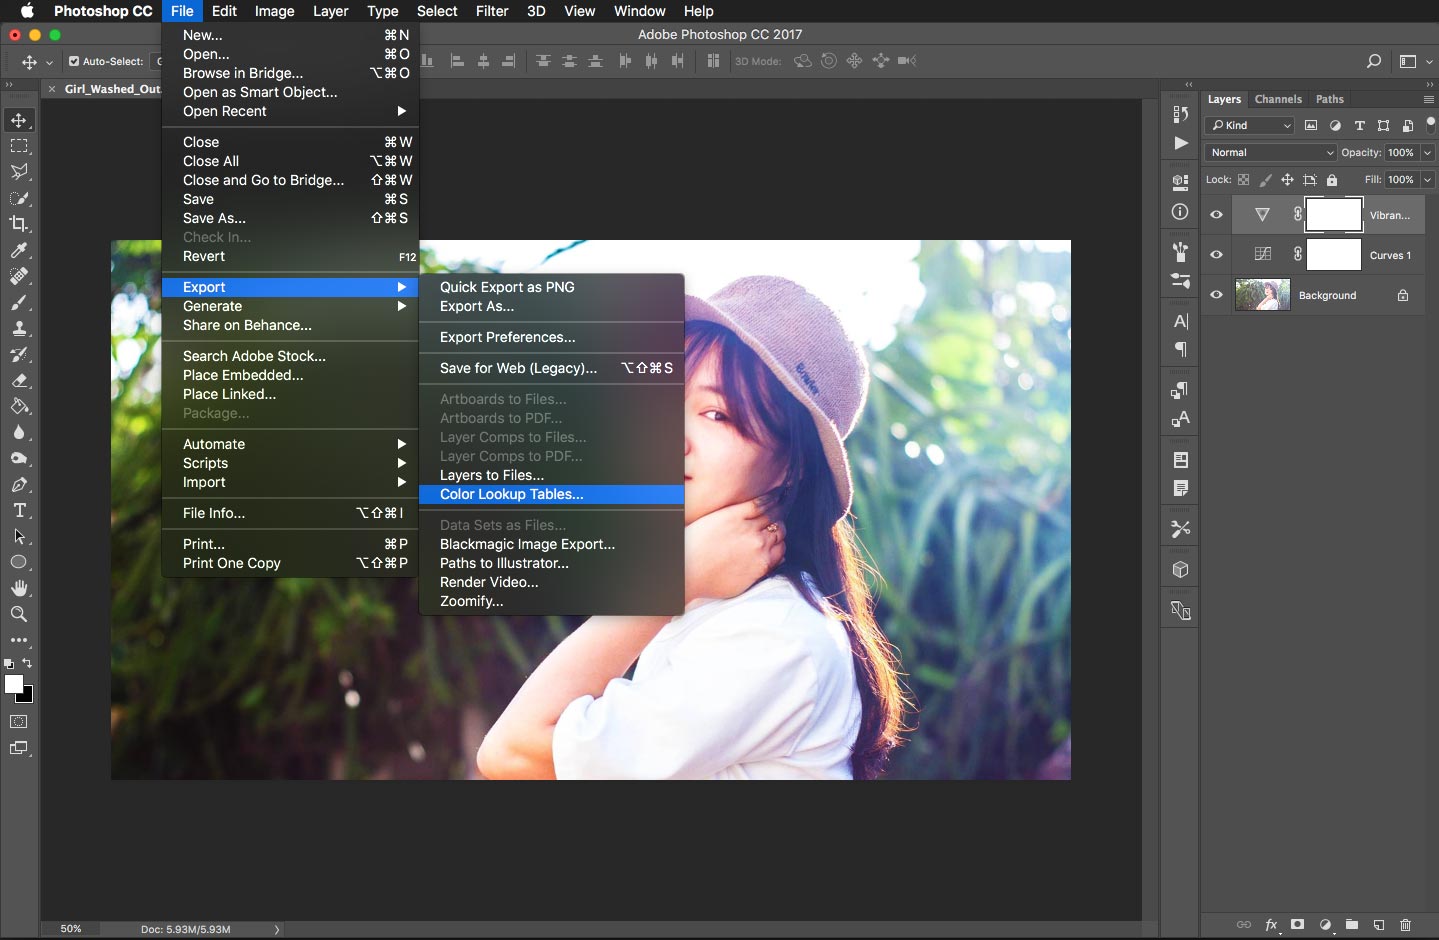
Time to export the LUT and get it into Final Cut Pro X
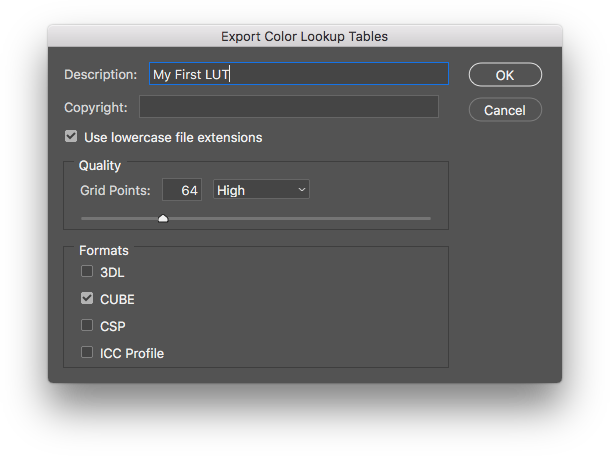
GO: File/Export/Color Lookup Tables
 You will be presented with a dialogue box.
Final Cut Pro accepts LUTS in .cube and .mga format, so CUBE is your only option here.
Hit OK, then you will get the saved location choice.
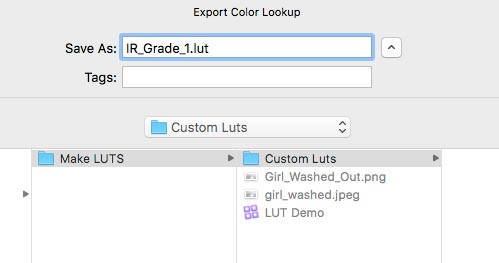
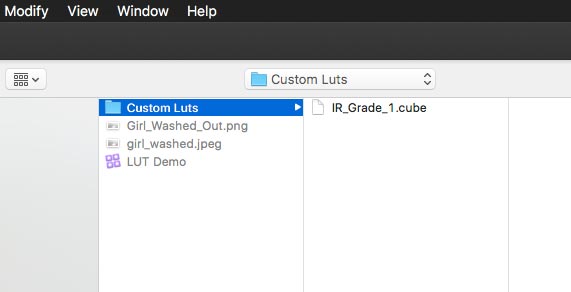
We suggest you make a folder for all of your custom LUTS. Don't worry about the .lut extension, it will be saved in the correct .cube format. This is the name of the LUT that will appear in FCPX.
The file extension has to be in lower case, we found that out the hard way when trying to load up a free LUT pack!
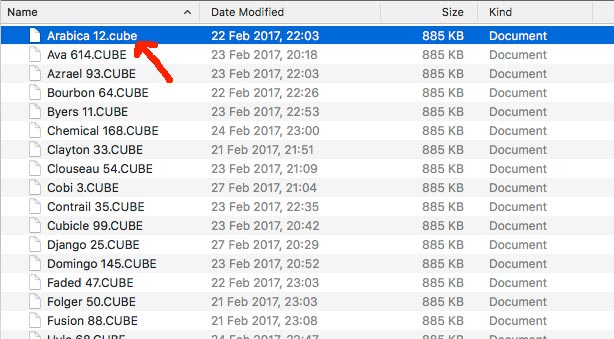
Changing the case of the extensions after they have been made works too as you can see below. Only Arabica shows up in FCPX.
Building a LUT in Affinity Photo
Import the still image into Affinity Photo and add as many adjustment layers as you wish to get the look you are after.

Then from the menu bar -
Go: File/Export LUT...

You will be presented with a lovely save dialogue box featuring a kitten- Aaah.
Make sure the extension is set to .cube and that the quality is set to 64x64x64. Then hit export and choose the name and location of the LUT. As before with Photoshop, we recommend creating a new folder for your custom LUTS.

Getting the LUT into Final Cut Pro X
After all that hard work and creativity, how do you get a LUT into Final Cut Pro X?
Find the Custom LUT effect in the Effect Browser (CMD 5) and apply that to your clip.
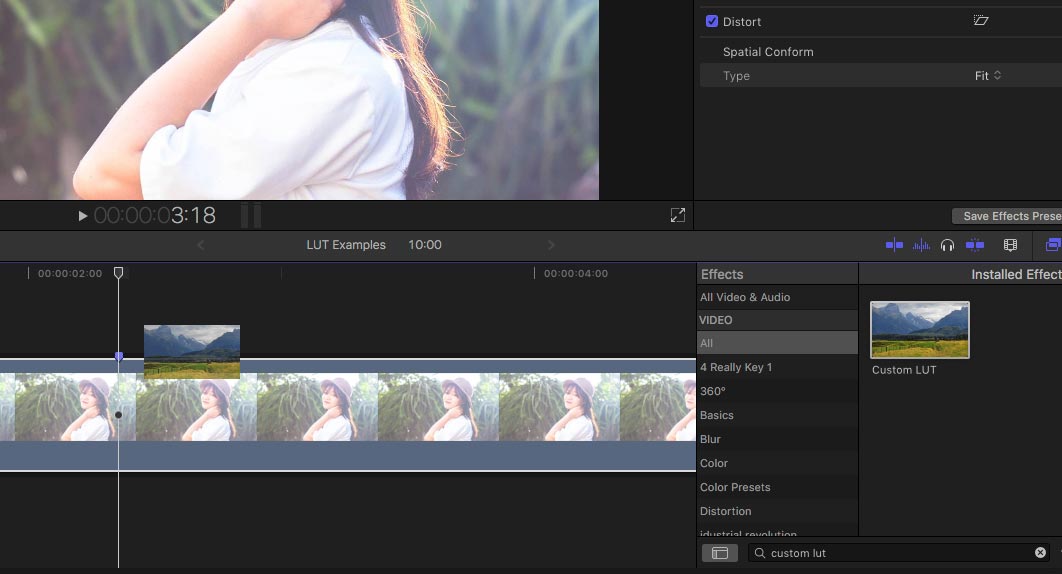
Once you have the effect applied, select the clip, open the Inspector (CMD 4) then toggle down the menu to Choose Custom LUT.
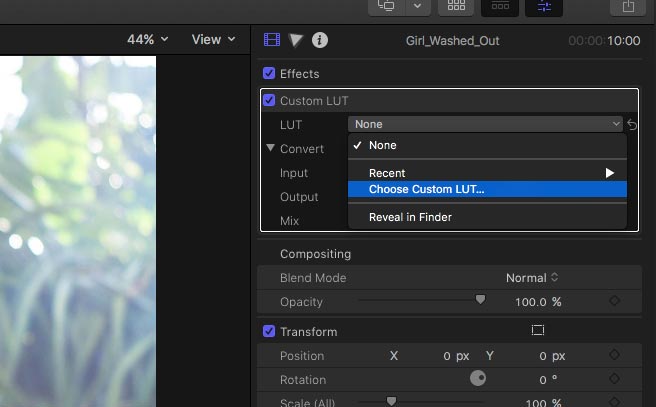
Navigate to your newly created custom LUTS folder and select the LUT you have just created.
And boom! There you have your own custom LUT right in Final Cut Pro X.

Clever eh? Don't forget you can also apply the effect to an FCPX adjustment layer to grade a whole string of clips at once.
Final Cut Pro 10.4 now has amazing colour correction built in, but there are times when you might need to use a LUT to match a look, or you want to use a LUT from a commercial pack, or indeed build you own.
Hopefully the tutorial helped you with all three. Enjoy!
As always, if you can add any information (like what do those grid points mean exactly or does it make a difference in 16 bit?) please get in touch.
1 Response
Leave a comment
Comments will be approved before showing up.
Also in Tutorials

Rough Graphic to Finished Final Cut Pro Template in Under 5 Minutes Using AI!
Take a simple network diagram example and transform it into a professional Final Cut Pro template. We'll follow a straightforward workflow that anyone can replicate.

AI Just Unlocked a NEW WAY to Colour Grade (Mind Blown!)
We explore how AI can automatically create custom LUTs (.cube files) for professional-grade color grading.

Get Final Cut Pro Sequence Data Into Google Sheets Using AI
How to extract all your Final Cut Pro project data into a spreadsheet. This is incredibly useful for project management, creating edit decision lists, or just keeping track of your media.
EFETACK
March 11, 2019
Great Tutorial. Thank you. I am very excited to finally create my own LUTs. Cheers,EFE