How to Delete Final Cut Pro X Renders
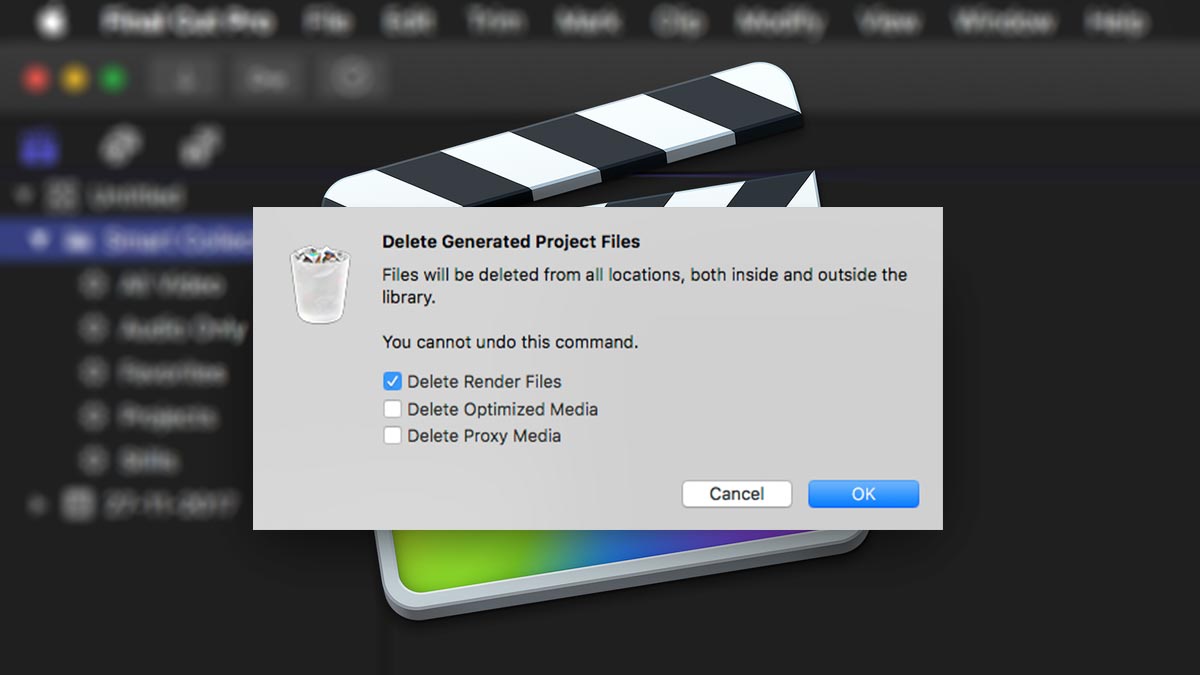
In this simple tutorial we show you how to trash Final Cut Pro X's renders. It's easy and you can choose between deleting a Project or a Library's Renders right in the app. No folders to navigate or original files deleted by mistake!
There are a few reasons why you might want to trash your Final Cut Pro X renders.
- It's always a good start if you are seeing an unexpected jump or glitch in the viewer. Sometimes Final Cut Pro will render the middle of a clip before the transitions have been rendered. Couple that with multiple plugins applied and sometimes things can get confused. It doesn't happen often though.
- You might want to slim down the size of a Managed Library before copying, moving or archiving.
- It should be on your first list of fixes to run through should you come across problems.
So how exactly do you trash the renders?
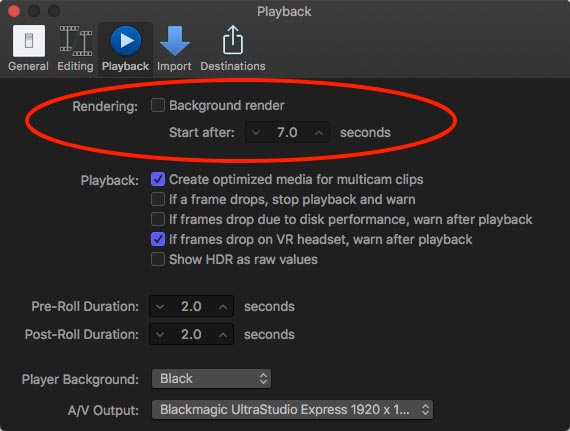
We would suggest you start by making sure that the Background Rendering option is turned off in the Preferences. Why? Well after you trash the Preferences, they will start rendering again!
How to trash a Project's Renders in Final Cut Pro X
Select the Project you want to delete the renders for.
Go: File/Delete Generated Project Files
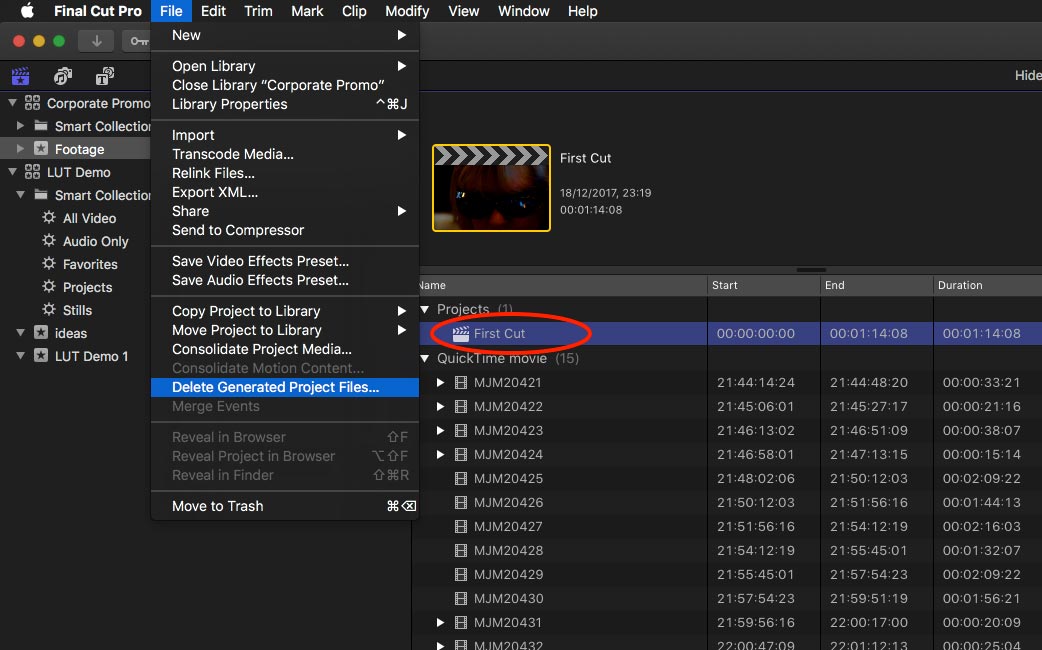
You will then get a drop-down screen with options.
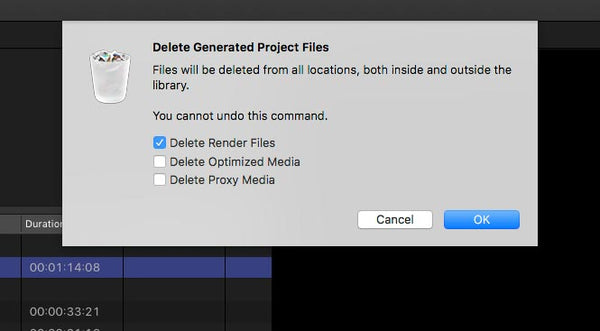
Select 'Delete Render Files' then hit OK and they should be deleted! They will be removed from the internal Library and external cache locations.
As you can see from the list, you also have the option to delete Optimised and Proxy media.
How to trash a Library's Renders in Final Cut Pro X
It's the same principle as trashing a Project's renders, but this time, you must have just the Library selected in the Browser.
Go: File/Delete Generated Library Files
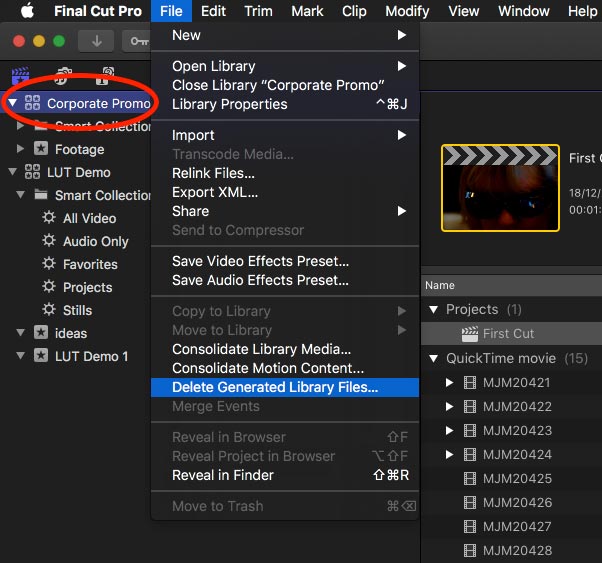
This time you will get a drop-down screen similar to the previous but with the option to delete all or just unused renders.
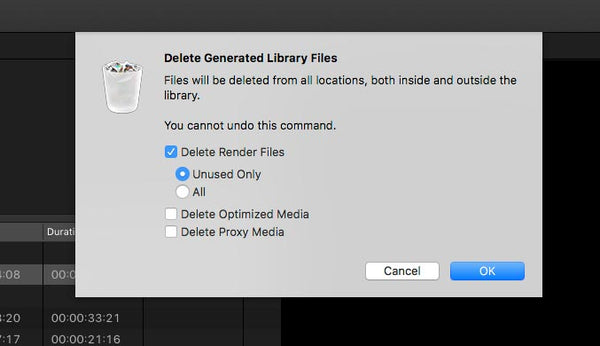
Choose what you want to delete and then click OK.
One word of warning here. Depending on the size of Library and the speed of your storage, it can take a few seconds to tens of seconds to complete the task.
If you try to quit Final Cut Pro X before all the renders have deleted, you will get a message warning that you are interrupting the process.
1 Response
Leave a comment
Comments will be approved before showing up.
Also in Tutorials

Rough Graphic to Finished Final Cut Pro Template in Under 5 Minutes Using AI!
Take a simple network diagram example and transform it into a professional Final Cut Pro template. We'll follow a straightforward workflow that anyone can replicate.

AI Just Unlocked a NEW WAY to Colour Grade (Mind Blown!)
We explore how AI can automatically create custom LUTs (.cube files) for professional-grade color grading.

Get Final Cut Pro Sequence Data Into Google Sheets Using AI
How to extract all your Final Cut Pro project data into a spreadsheet. This is incredibly useful for project management, creating edit decision lists, or just keeping track of your media.


Christoph
April 01, 2022
Good Explanation.
But how can I prevent Final Cut Pro to produce these Junk files?
On my harddrice, FC created 1,5TB of Render files that add nothing to project quality or anything.
I disabled the options (create optimized media, …) long ago, but still FC renders small files to big junk files.