How to Auto White Balance Colours in Final Cut Pro X 10.4

In this tutorial we will show you how to get rid of unwanted colour casts using the Auto White Balance tool in Final Cut Pro X
When Final Cut Pro X was released back in June 2011, one of the missing features from FCP7 was the Auto White Balance tool. Many editors complained that the handy eyedropper that made a 'one click fix' for colour correction had gone.
The good news is that the eyedropper and the Auto White Balance features are back in Final Cut Pro X 10.4, but not where you would expect to find them!
Let's find them and use them!
Here you can see we have an indoor portrait with a rather nasty colour cast. This can happen with fluorescent lighting or even something simple like the cameraman getting the white balance or filter on the camera wrong. (It does happen!)

Before the 10.4 update you had two choices how to fix the colours.
1) Mess about with the Colour Board with an eye on the vectorscope trying to remove the cast.
2) Buy a third party colour correction plugin or roundtrip through another NLE or colour grading app.
Thankfully you now have a third option right inside FCPX.
You would think that you need to head straight over to the colour tools in the Inspector (CMD 4) looking for the auto white balance, but you would be wrong.
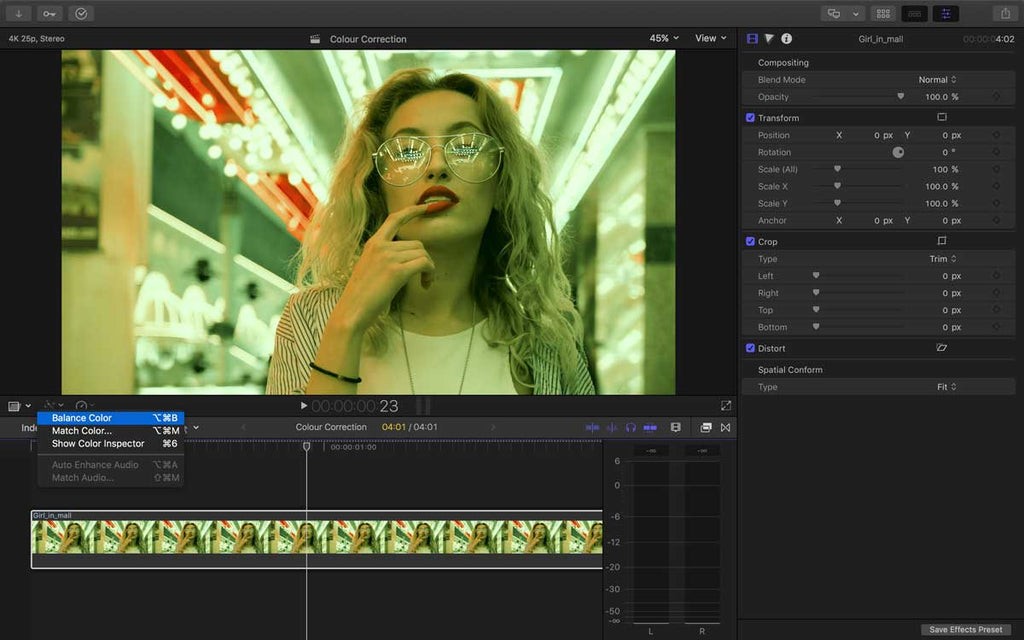
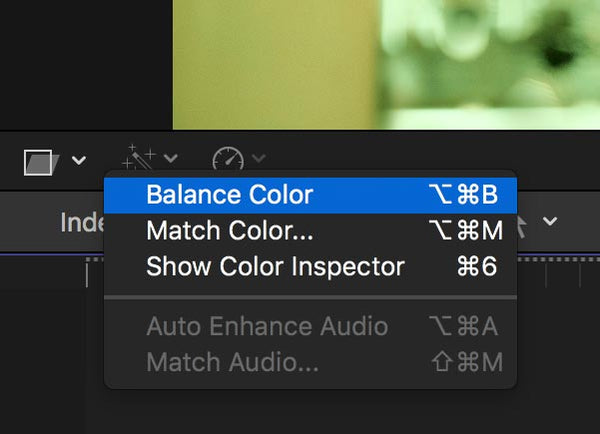
Navigate to the bottom left of the canvas where you will see three icons. Then click on the magic wand and select Balance Color or you could use the shortcut OPT CMD B.
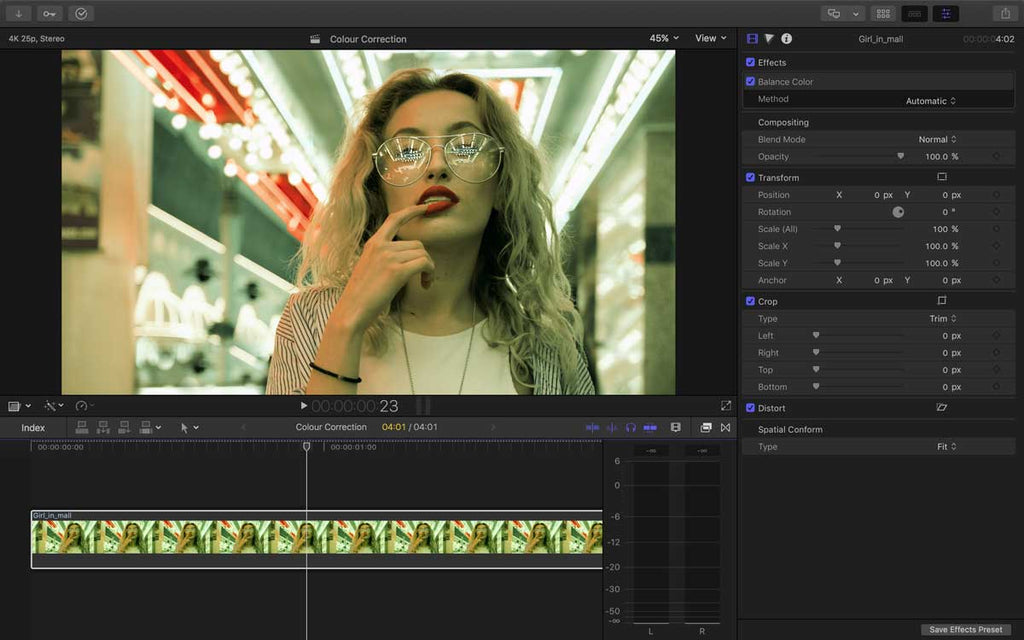
This will apply an FCPX generated balance, which does look a lot better than the original, but there is still a cast.
You might notice a slight contrast change as well as Final Cut Pro X expands the blacks and whites to their corresponding 0% and 100% levels.
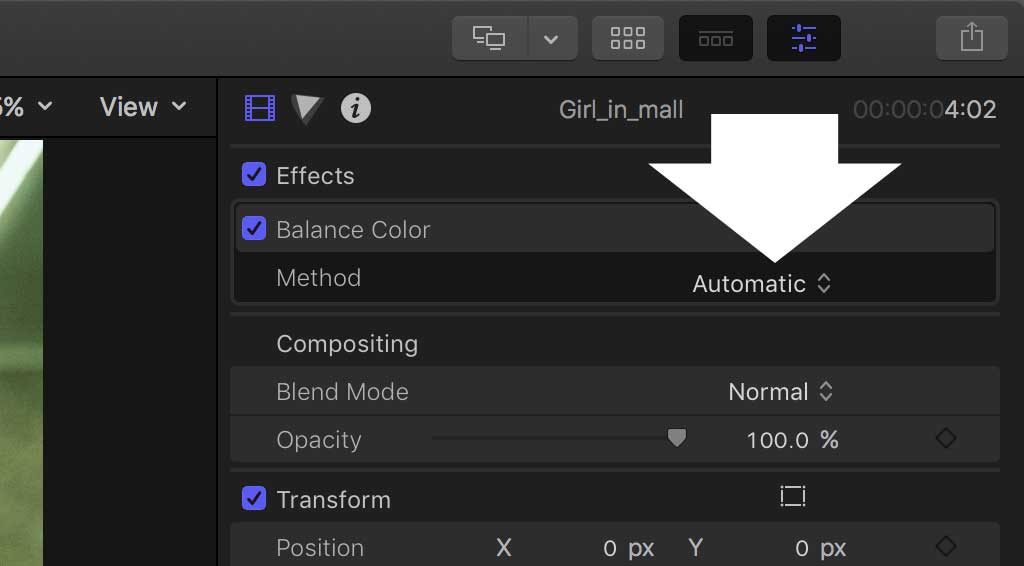
The controls will appear in the Video Parameters Tab in the Inspector.
Idustrial Revolution Super Tip:
You can also apply this colour correction fix to clips and images in the Final Cut Pro X Browser, not just the Timeline!
Back to the Inspector and select White Balance form the dropdown menu in the Balance Color controls.
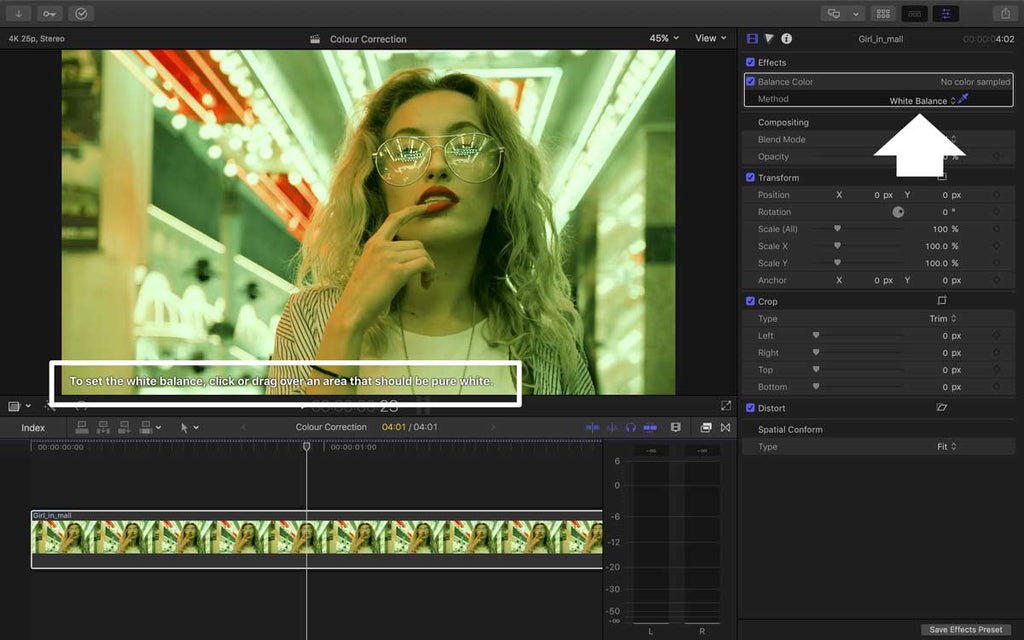
You will see that FCPX gives you a little hint here in the bottom left hand corner of the canvas to select an area that should be pure white.
We would go further and say avoid the completely blown out whites such as the lights in the roof. Instead, we will sample her T-shirt which although is not 100% white, it does have more colour information.
Move the Cursor and it will change to the Eyedropper. Select the area and the whole image should change.
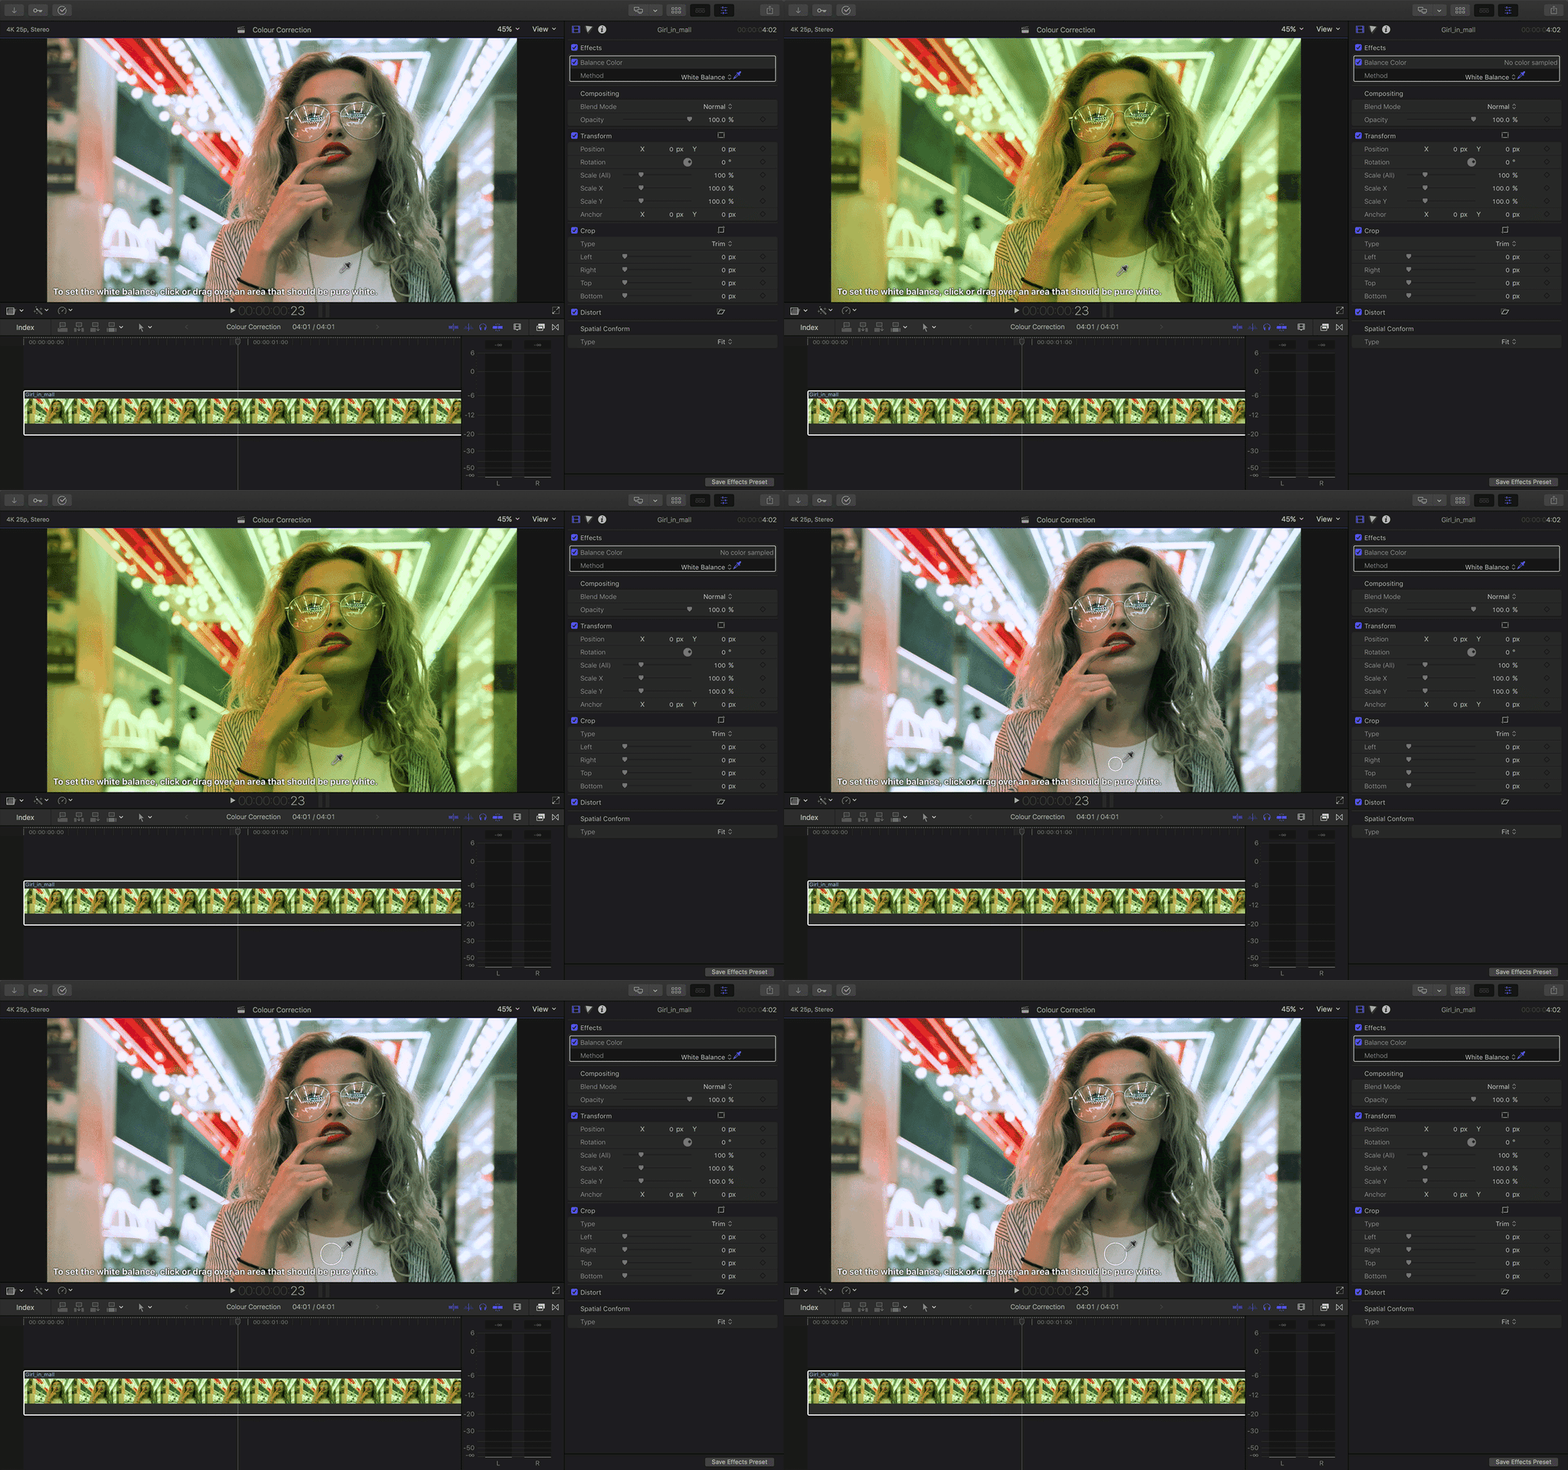
And that is Auto White Balancing by choosing an area you wish to be white.

You can off course use this setting on other clips by clicking the Save Effects Preset button in the bottom right hand corner of the Inspector.
1 Response
Leave a comment
Comments will be approved before showing up.
Also in Tutorials

Rough Graphic to Finished Final Cut Pro Template in Under 5 Minutes Using AI!
Take a simple network diagram example and transform it into a professional Final Cut Pro template. We'll follow a straightforward workflow that anyone can replicate.

AI Just Unlocked a NEW WAY to Colour Grade (Mind Blown!)
We explore how AI can automatically create custom LUTs (.cube files) for professional-grade color grading.

Get Final Cut Pro Sequence Data Into Google Sheets Using AI
How to extract all your Final Cut Pro project data into a spreadsheet. This is incredibly useful for project management, creating edit decision lists, or just keeping track of your media.


Rishikes sarker
February 21, 2020
Wow, So amazing information share this post. Actually i have photo color correction website and this post are so help me improve for my work. I appreciate you sharing this blog article.