How to Create the Stacy's Mom Effect in Final Cut Pro X

No, not Rachel Hunter pole dancing in the kitchen! In this tutorial we show you how to build the animating stroke outline or border around a moving object in Final Cut Pro X.
All created within FCPX itself, we show you a quick keying trick to easily achieve this effect.
The look was made popular by the 'Stacy's Mom' video from the American rock band, Fountains of Wayne.

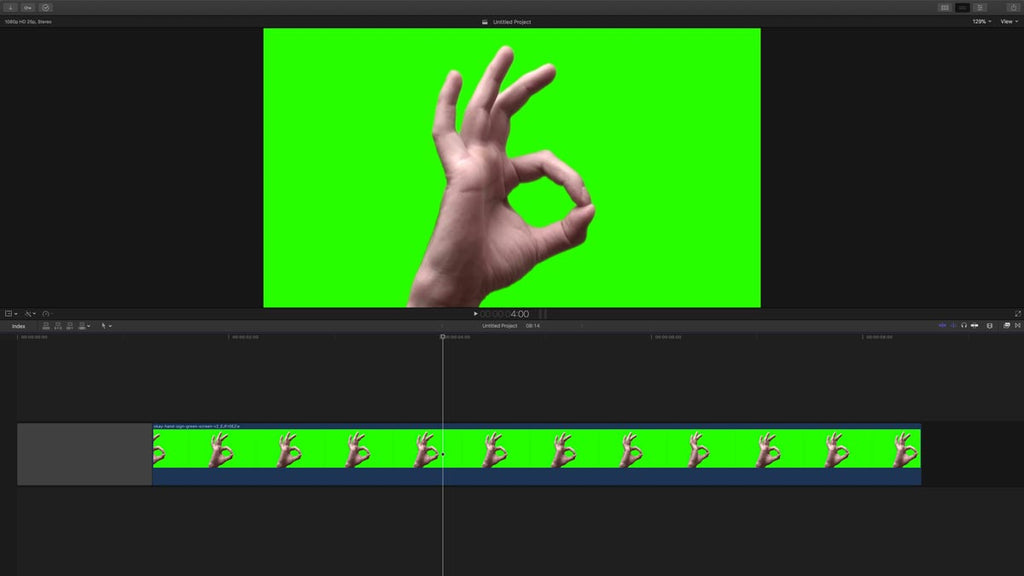
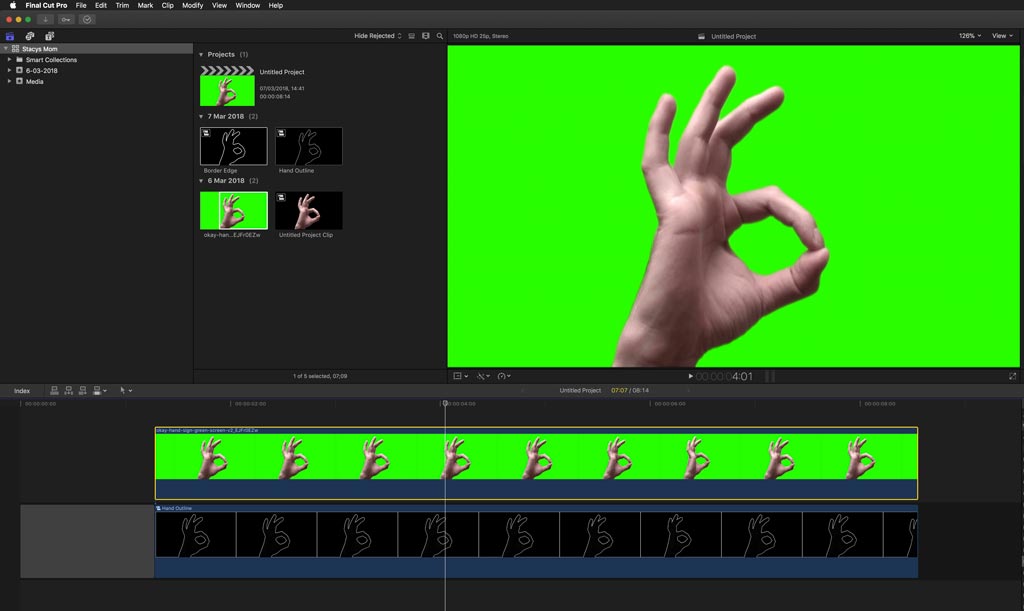
We will use this footage of a hand filmed on green screen for the tutorial. Add it to the Final Cut Pro X timeline.
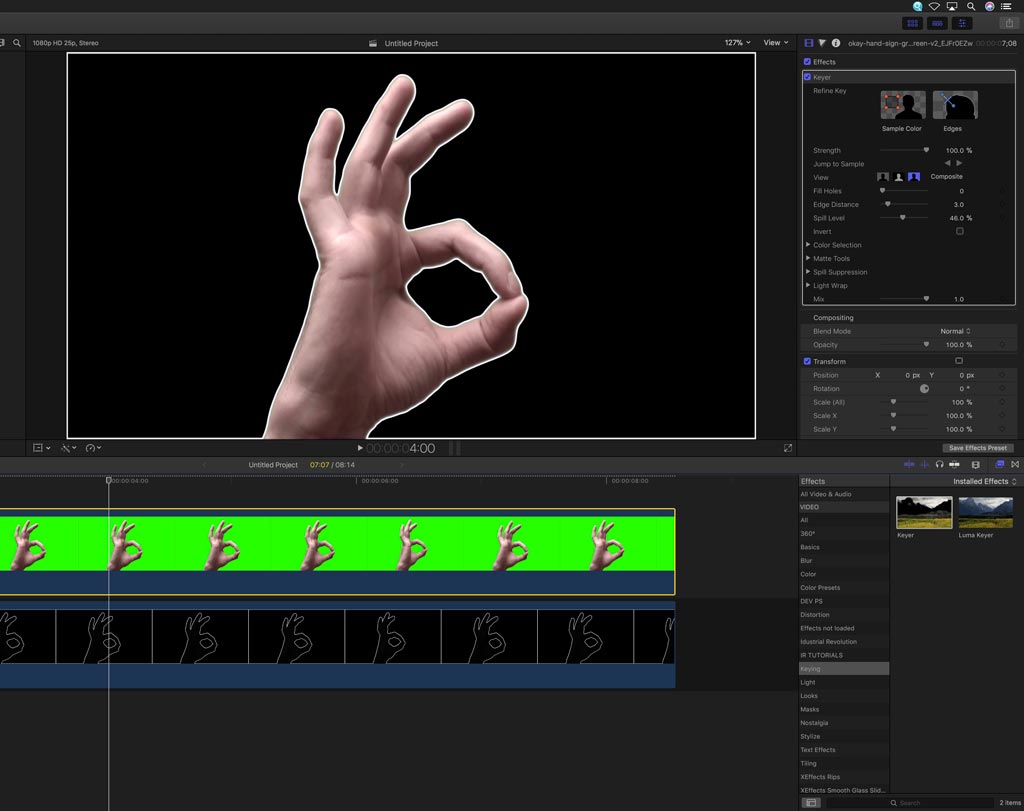
Open up the Effects Browser (CMD 5) and find the Keyer effect in the bottom right hand corner of the FCPX GUI. This is a chromakeyer for removing green or blue screens although it is just labelled 'Keyer.' Apply it to the clip of the hand.
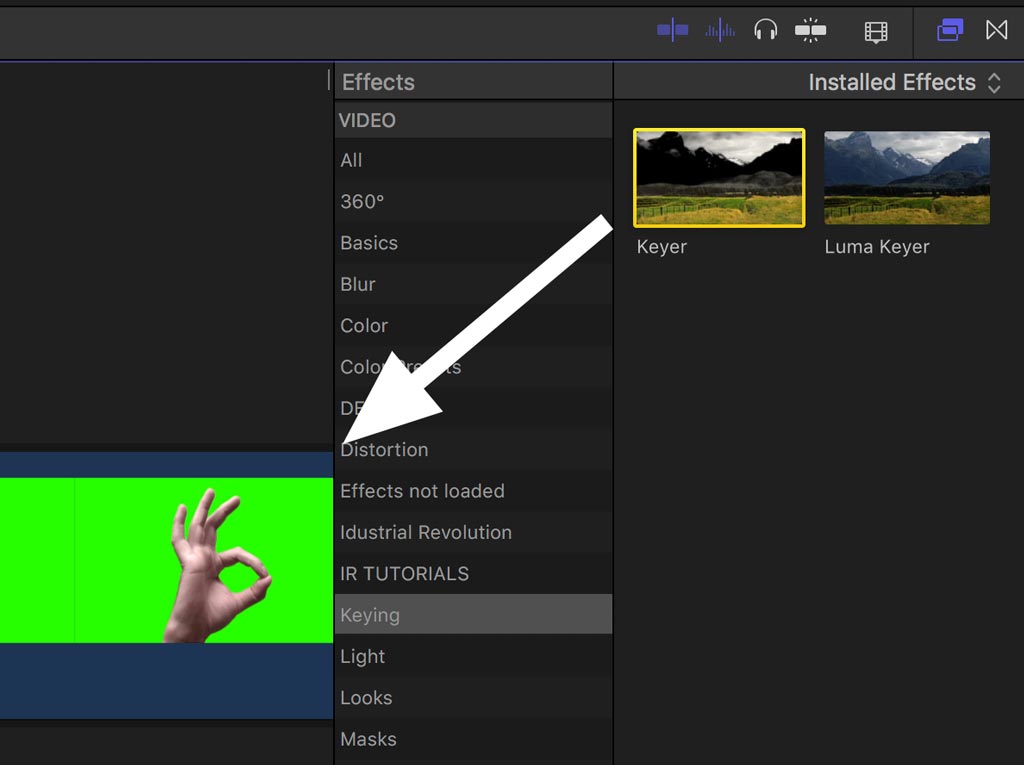
Final Cut Pro X is pretty clever when it comes to keying out green screen and with the Keyer applied, you should instantly see the object separated out on its own.
We won't go into the subject of getting a good key, we shall save that for another tutorial, but this one-click process for green is good enough for this example.
Here comes the clever bit...
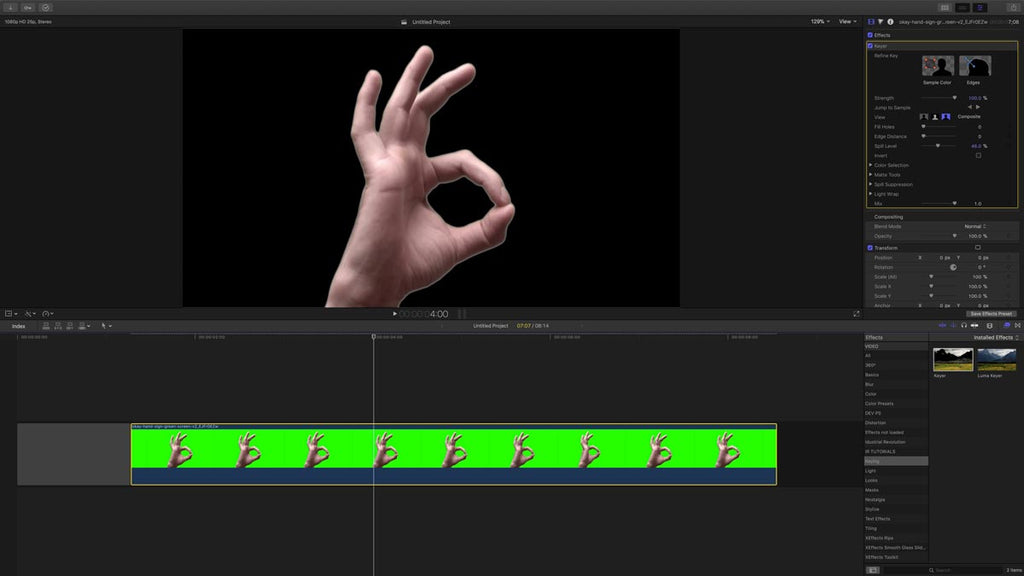
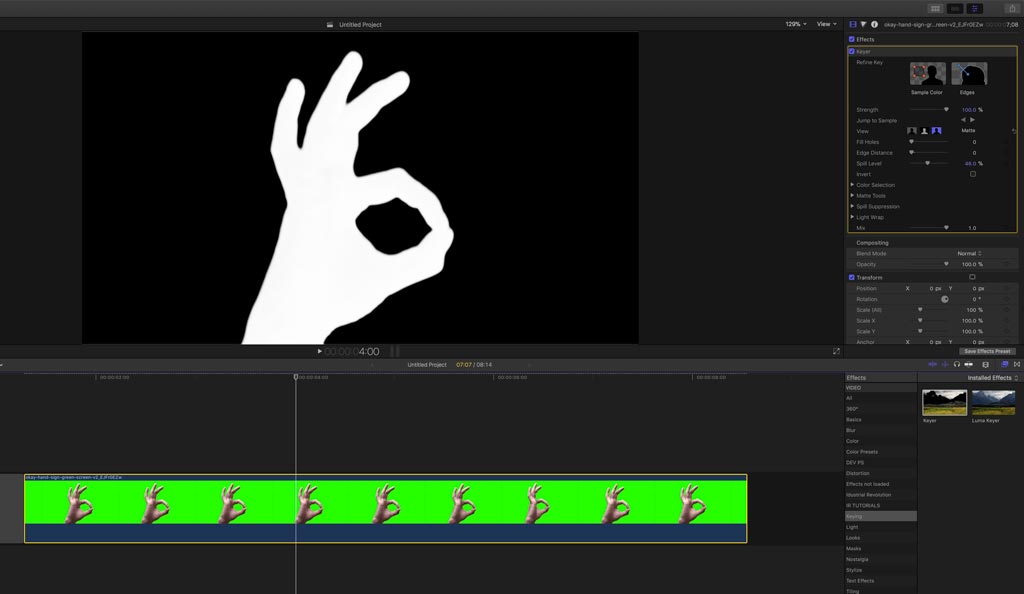
Open up the Keyer controls in the Inspector (CMD 4) if they are not visible already.
You will see three boxes each with a slightly different head and shoulders icon.
- By clicking on the box on the left, the FCPX viewer will display the media with the key applied
- By clicking on the box in the middle, the FCPX viewer will display the matte or key of the media
- By clicking on the box on the right , the FCPX viewer will display the media without the keyer applied.
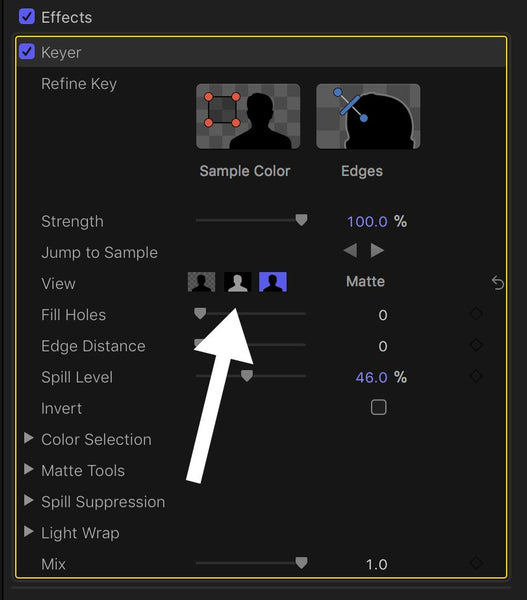
These options are not just display options, the mode displayed will affect the timeline and any export. We shall use this to our advantage!
Leave the Keyer set to the middle option to show the matte.
 Then hold down the OPT or ALT key and drag the clip up so another instance of the media is created and sit that connected in sync to the original clip. Both clips must be lined up exactly.
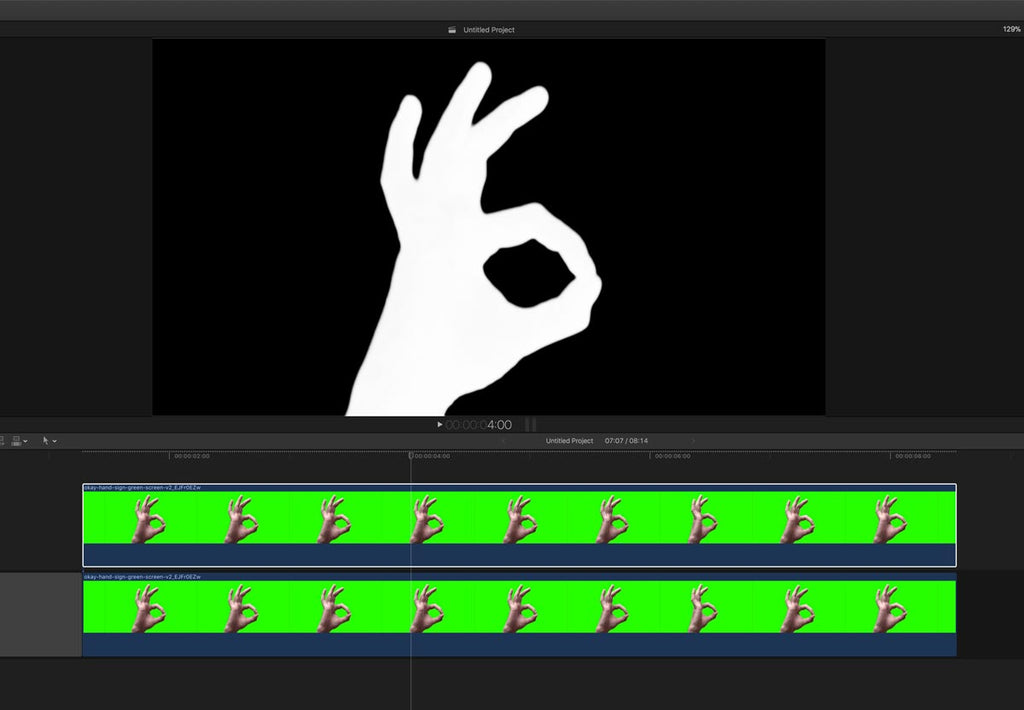
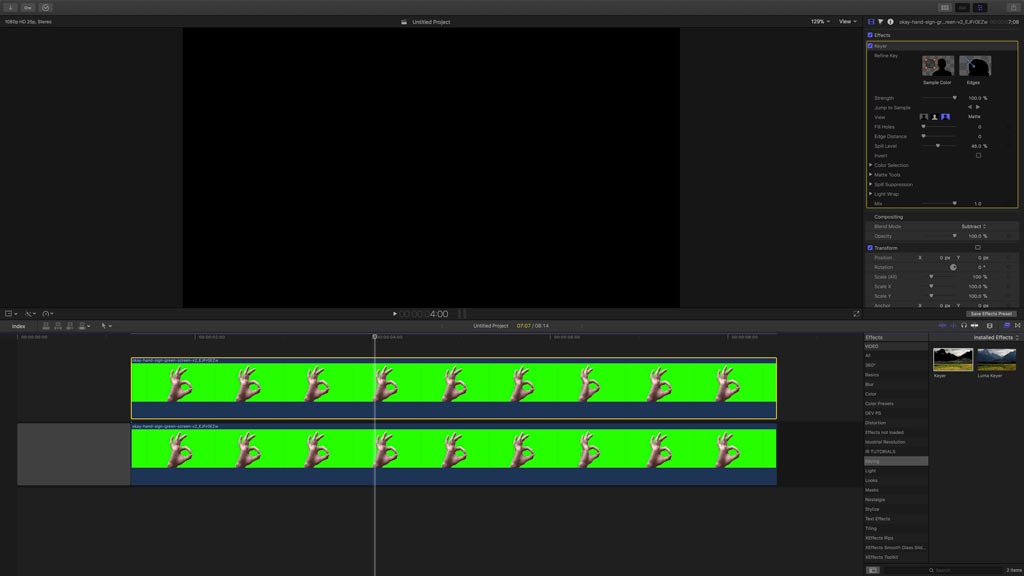
Select the top clip, then in the Inspector change the Blend Mode from Normal to Subtract.

The viewer should go black. This seems slightly odd, but it enables us to do the next step.
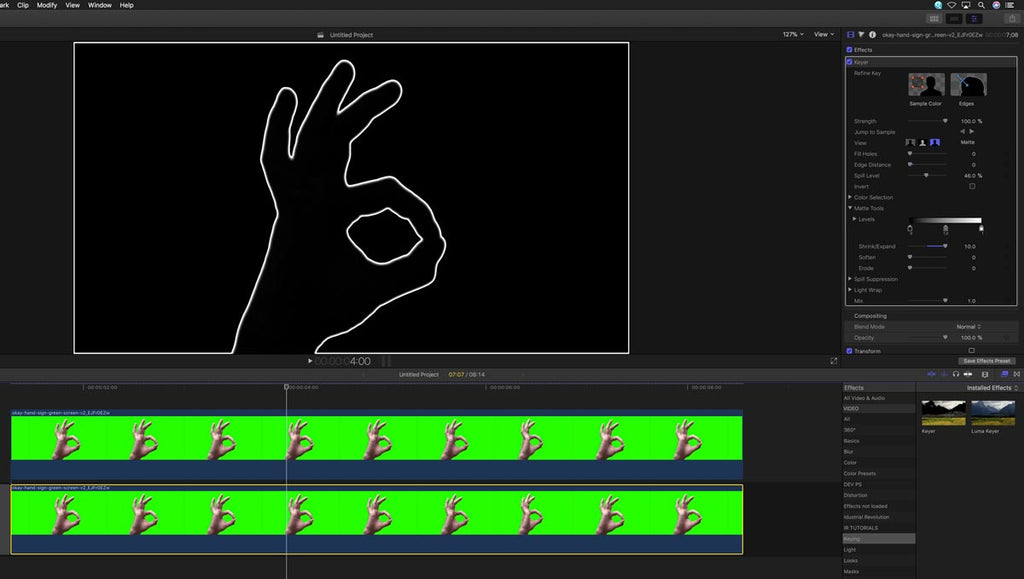
Select the bottom clip of the hand footage and go to the Keyer controls in the Inspector.
Open up the disclosure triangle of the Matte Tools and slide the Shrink/Expand control over to the right.
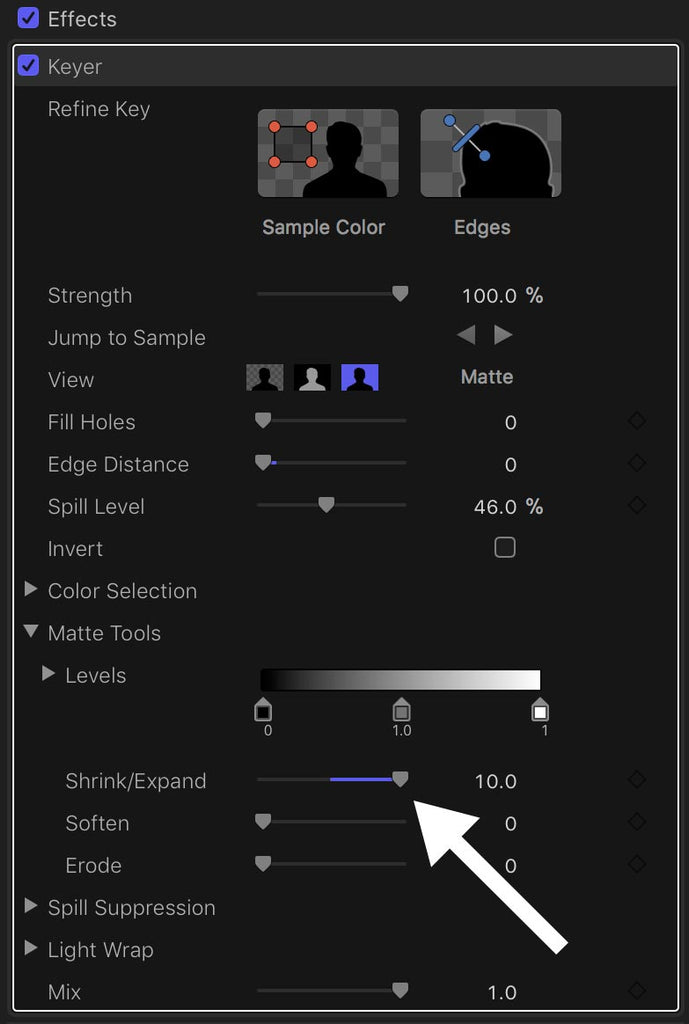
You should see an outline grow before your eyes! Don't worry about the white line around the edge of the frame, we will fix that later.
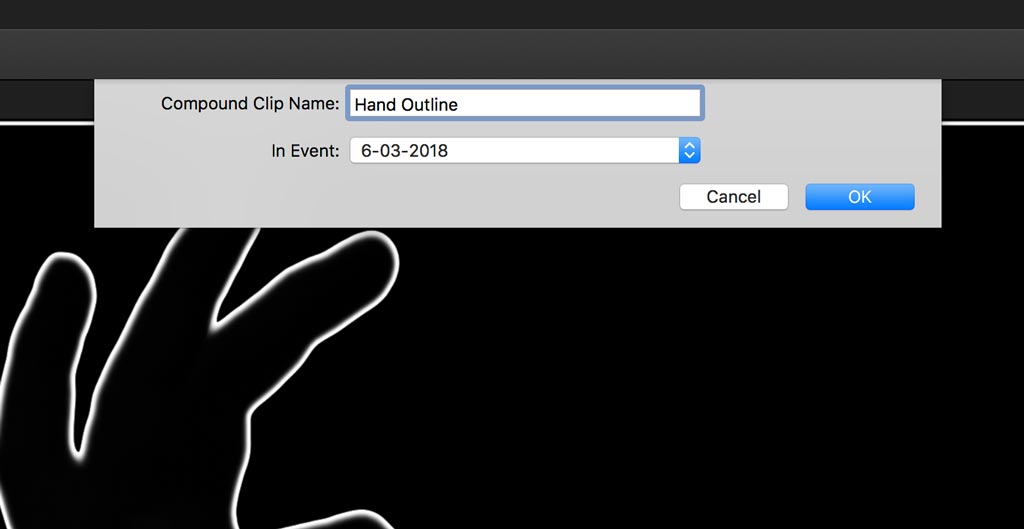
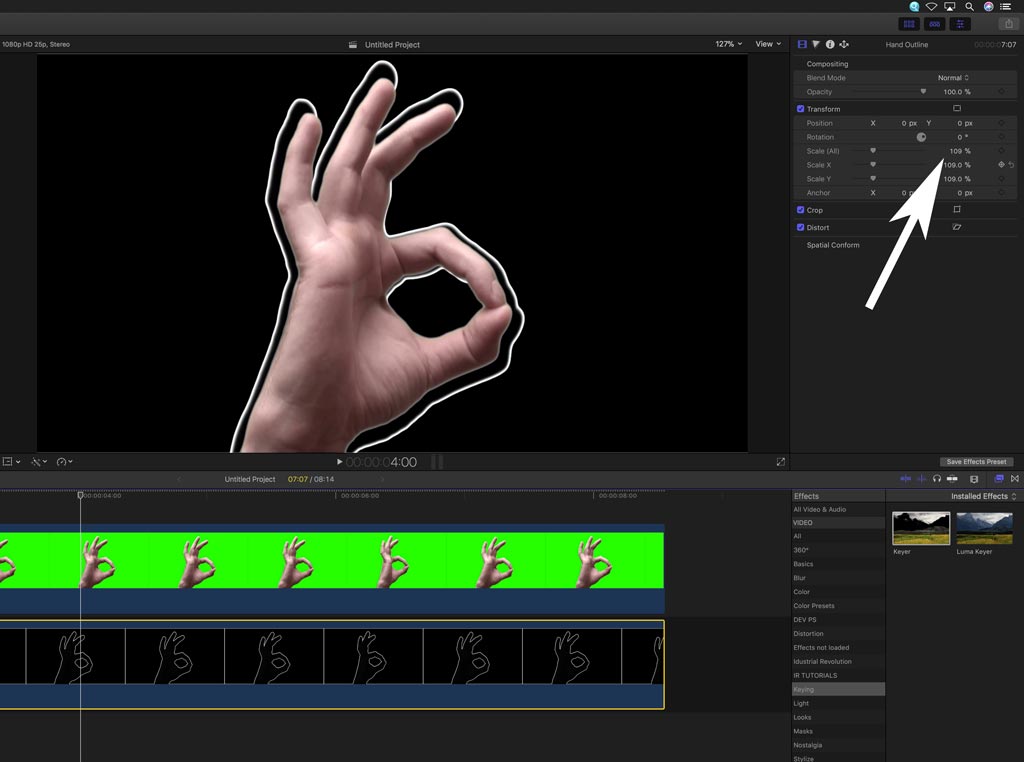
Select both clips on the FCPX timeline and make them into a Compound Clip by right clicking or using the keyboard shortcut OPT G.
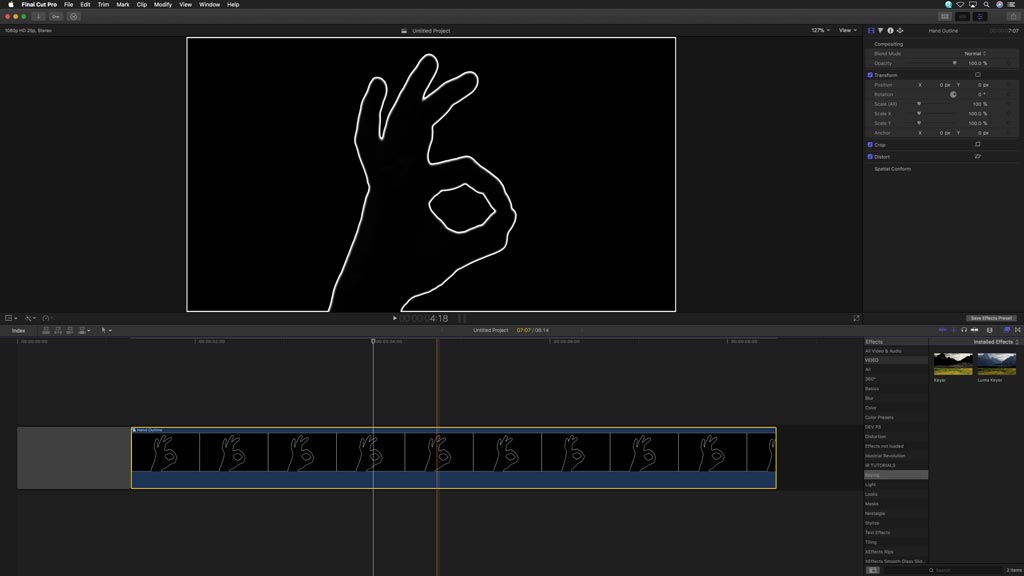
Then, from the Browser, add another instance of the greenscreen hand video as a Connected Clip on top of the Compound Clip. It too needs to be in sync with the original media in the Compound Clip below.
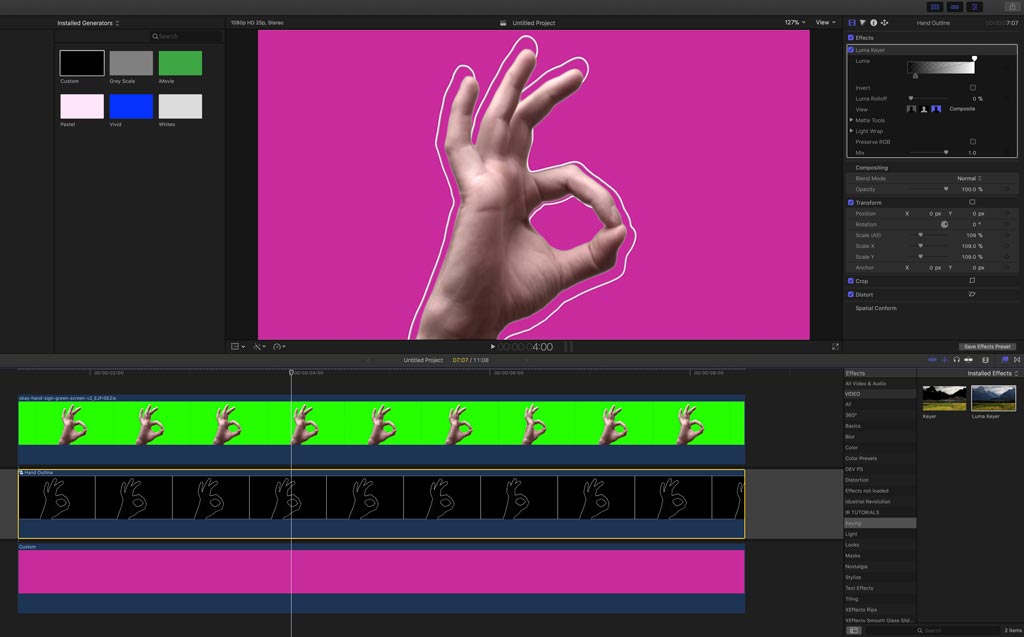
Add another instance of the Keyer effect to the media you just added, you should see the hand keyed over black with the border visible.
Select the Compound Clip on the bottom and in the Inspector, adjust the Scale to expand the border away from the keyed image. In this example we set it to 109%.
Nearly there! We have an animating border around the hand so now for the background.
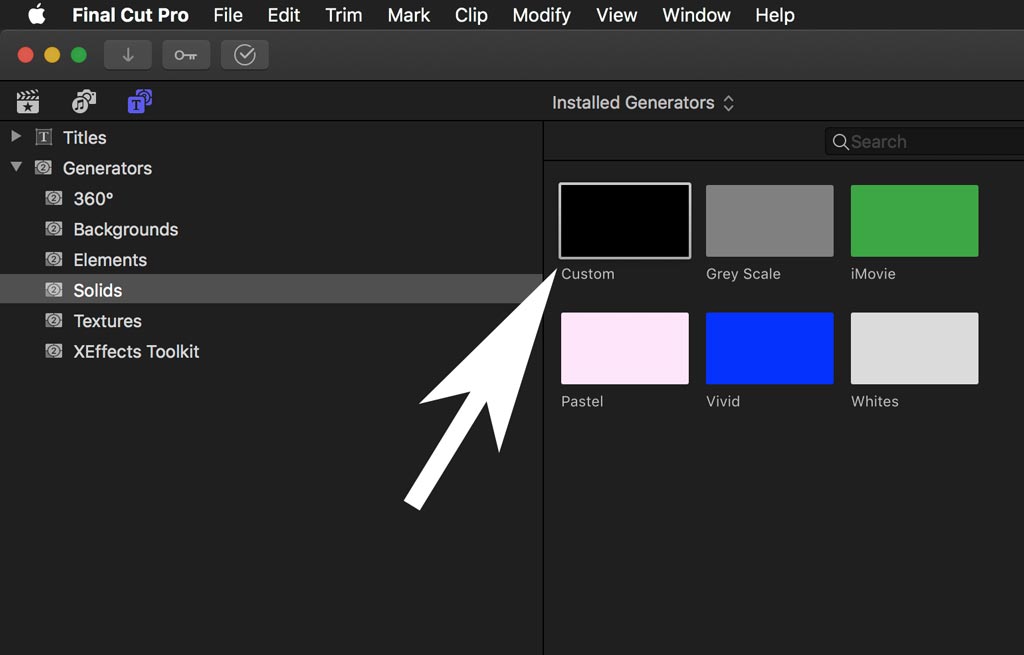
In the Generators section in the Browser, find the Custom generator under the Solids heading and drag that below the Compound Clip on the Timeline.
Change the colour of the Generator, here we have picked the bright pink that was used in the Stacy's Mom video.
But why isn't the colour showing up behind the hand?
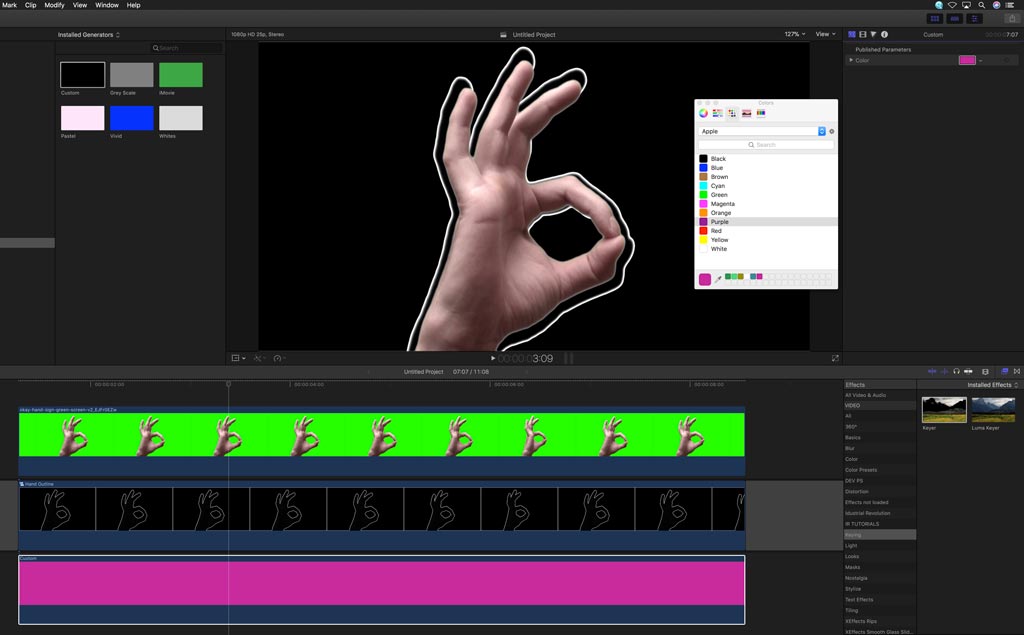
We need to add another keyer to the Compound Clip, this time the Luma Keyer from the Effects Browser (CMD 5).
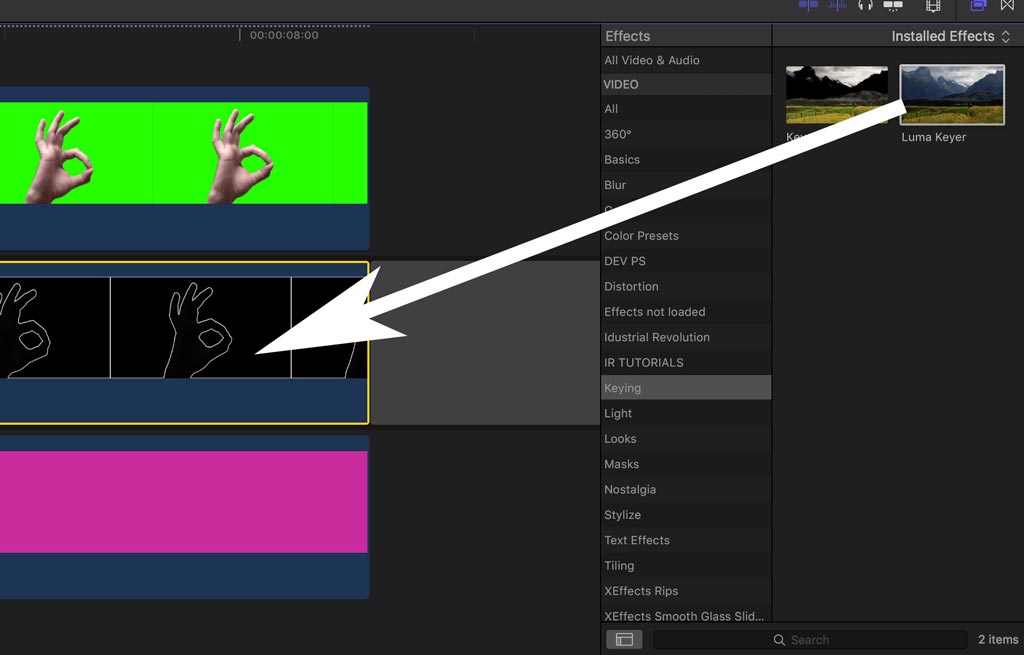
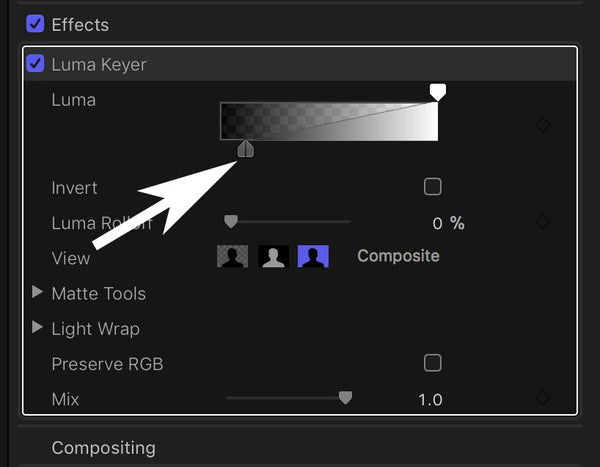
In the Inspector, slide the lower 'black limit' control of the Luma Keyer effect away from the left hand edge. This will key the black out of the Compound Clip leaving just the border on a transparent background.
And that should give you the 'Stacy's Mom' effect right in Final Cut Pro X.
You can of course make the border bigger by entering a larger number in the Shrink/Expand control in the original Keyer. You can also overlay the line on top of the video and offset it even more. Or colourise and blur the line to achieve exactly the effect you desire.
Leave a comment
Comments will be approved before showing up.
Also in Tutorials

Rough Graphic to Finished Final Cut Pro Template in Under 5 Minutes Using AI!
Take a simple network diagram example and transform it into a professional Final Cut Pro template. We'll follow a straightforward workflow that anyone can replicate.

AI Just Unlocked a NEW WAY to Colour Grade (Mind Blown!)
We explore how AI can automatically create custom LUTs (.cube files) for professional-grade color grading.

Get Final Cut Pro Sequence Data Into Google Sheets Using AI
How to extract all your Final Cut Pro project data into a spreadsheet. This is incredibly useful for project management, creating edit decision lists, or just keeping track of your media.